

 русский
 Español
 عربى
عربى


Tail Lights Mold are easy to overlook because they sit behind the final product. Once the vehicle is finished, most attention goes to the lighting effect, not the tool that created it. Yet inside the factory, the mold is where most of the visual and structural behavior is decided.
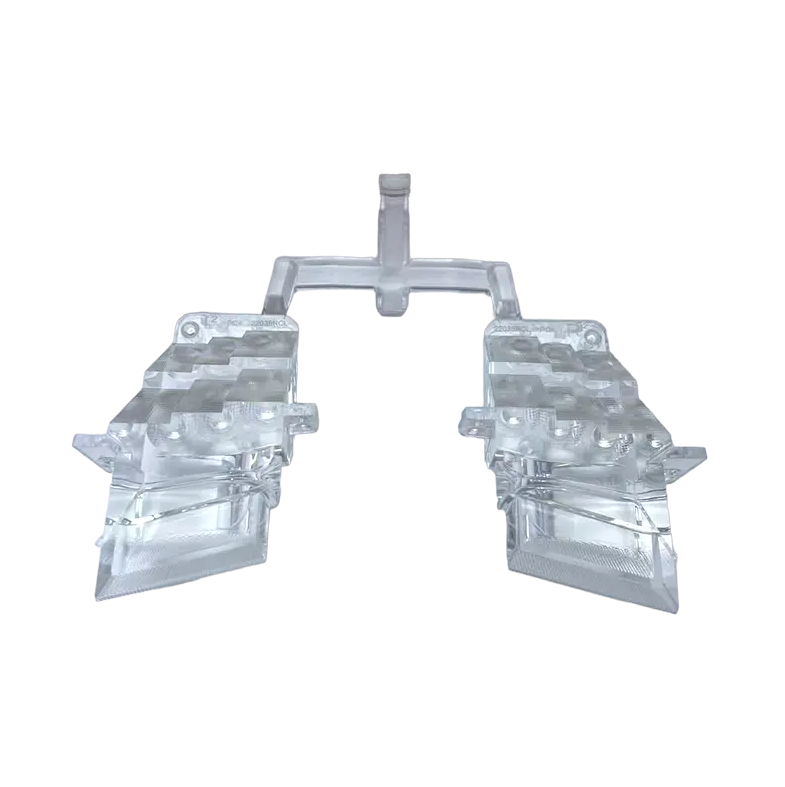
Making this type of mold is not a single action. It is a chain of connected steps. Each stage affects the next one in small but noticeable ways. If something is slightly off early on, it can show up later as uneven light, fitting issues, or surface inconsistency.
How does everything start with design planning?
Before any material is cut or shaped, the process begins on a drawing level. This stage is less about machines and more about decisions.
Design planning focuses on how the tail light should look and behave. That includes outer shape, internal divisions, and how light is expected to travel through the final piece.
At this stage, designers often go back and forth. A curve might be adjusted slightly. A corner may be softened. These are not major changes, but they influence how light spreads later.
It is also where practicality meets appearance. A design that looks good still needs to work in production without causing unnecessary difficulty.
Why does material choice matter so much?
Once the overall design plan is locked in, picking the right material for the mold becomes the next critical step.
This single decision directly determines how well the mold holds up over long‑term use. In real production, molds go through constant pressure cycles and regular temperature shifts every day. Some materials keep their shape far better under these repeated stresses than others.
Manufacturers mainly focus on four key performance points:
- Keeping a steady structure through years of repeated use
- Standing up to ongoing surface wear and abrasion
- Maintaining sharp, consistent detail accuracy
- Reacting evenly to heat and pressure changes
Different zones on one single mold face different levels of stress. That means the chosen material has to perform reliably across the whole mold structure, not just in a few less‑stressed spots.
What happens during rough shaping?
Right after material selection, the mold starts to take physical shape. At this early stage, the work is still basic, with no fine details worked in yet.
Rough shaping simply removes extra material to build up a basic outline of the final mold. The form at this point is just a coarse draft, far from finished.
The main priority here is structural stability, not high precision. Craftsmen work gradually, slowly building toward the target shape. Removing too much material too fast risks throwing the whole piece out of balance, so the process stays slow and controlled.
Even though it looks straightforward from the outside, this step lays the groundwork for all later refining and finishing work.
How is precision shaping different from rough work?
Once the core rough structure is finished, work shifts to fine‑tuning every small feature. This is when the mold really starts matching the intended final design.
Precision shaping requires much more careful, detailed work. Curves are smoothed and refined, surface transitions are blended cleanly, and tiny sections that affect light movement are carefully adjusted.
For tail light molds especially, these subtle details make a huge difference, since light distribution relies entirely on precise geometry. Even a tiny shift in surface angle changes how brightness spreads across the finished lens.
This stage is all about repeated small tweaks rather than big structural changes. Workers refine and adjust what's already in place, step by step.
Why is surface finishing such a sensitive step?
After all shaping work is done, the mold surface still needs careful finishing. This stage directly shapes how the final illuminated tail light will look in real use.
A smoother mold surface lets light travel more evenly through the plastic lens. Slightly textured areas are used where softer light diffusion is needed. The aim is not to make every spot identical, but to control surface variation exactly where required.
Even faint scratches or uneven patches on the mold surface will show up in the final light effect. That's why finishing is done slowly, with constant checks throughout.
This step also leans heavily on worker experience. The line between good consistent quality and uneven performance often comes down to extremely small surface details only seasoned makers can catch.
How is assembly handled in multi-part molds?
Tail light molds are usually not single blocks. They are made of several parts that need to fit together.
During assembly, each section is checked for alignment. If one part is slightly off, it can affect the entire structure during use.
Key points during this stage include:
- Matching contact surfaces carefully
- Keeping movement between parts stable
- Avoiding gaps or uneven pressure points
- Ensuring repeatable positioning
The goal is not just to connect parts, but to make them behave as one system during repeated production cycles.
What role does testing play before full production?
Before the mold is fully used, it goes through testing. This is where real behavior is observed rather than assumed.
Testing often reveals small issues that were not visible during earlier stages. These might include uneven filling, surface irregularities, or slight alignment drift.
Adjustments are made based on what is seen during these trials. Sometimes only minor changes are needed. Other times, a section may need to be reworked to improve consistency.
This stage may be repeated more than once until the mold behaves steadily.
How does surface consistency affect final lighting quality?
Even when everything is assembled correctly, surface behavior still plays a major role in the final result.
If certain areas reflect light differently, the tail light may appear uneven when turned on. This is especially noticeable in modern designs where lighting is part of the visual identity of the vehicle.
Consistency does not mean everything is identical. It means each section behaves as expected, without unexpected variation.
Maintaining that balance is one of the main goals throughout the entire process.
What happens after the mold is put into use?
Once production begins, the mold does not stop changing. Over time, repeated use can slowly affect its surface and alignment.
This is why regular checks are part of the workflow. Workers look for small signs of wear or change in behavior.
Typical maintenance includes:
- Cleaning accumulated residue
- Checking alignment between sections
- Observing surface condition
- Making small adjustments when needed
These actions help keep production stable over longer periods.
How do all these steps connect in practice?
Each stage in the process is connected. Nothing stands alone. Design decisions influence shaping. Shaping affects surface behavior. Surface condition affects final testing.
If one step is rushed or overlooked, the effect can carry forward.
A simple way to understand the flow is:
| Stage | Focus | Purpose |
|---|---|---|
| Design | Shape planning | Define structure and light behavior |
| Material selection | Stability | Support long-term use |
| Rough shaping | Basic form | Create foundation |
| Precision shaping | Detail control | Refine structure |
| Surface finishing | Optical effect | Influence light appearance |
| Assembly | Fit and alignment | Build complete mold |
| Testing | Real performance | Identify adjustments |
| Maintenance | Long-term stability | Keep production steady |
Tail light mold manufacturing is not about a single moment of creation. It is a sequence of careful steps that build on each other. The final result depends not only on how each step is done, but also on how smoothly they connect over time.
